Fastest way to unleash the full power of i18next (in 3 steps)

Internationalization (i18n) and localization (l10n) are crucial for businesses that want to expand globally and reach a wider audience. To do this, you need a robust solution that can handle different languages and cultural nuances, and this is where i18next and locize come in. These two elements have been designed to help you get the most out of your i18n efforts, and when used together, they are a powerhouse combination that can help you achieve your goals faster and more efficiently.
In this article, we'll explore the fastest way to unleash the full power of i18next in 3 steps.
Precondition
We assume you know i18next and already use it. If you don't know i18next, we suggest you read this.
In this article, we also assume you're loading your translation resources via i18next-http-backend plugin, but that's not really mandatory.
Step 1 - Create a locize project
Sign up and create a new locize project for free, like described here.
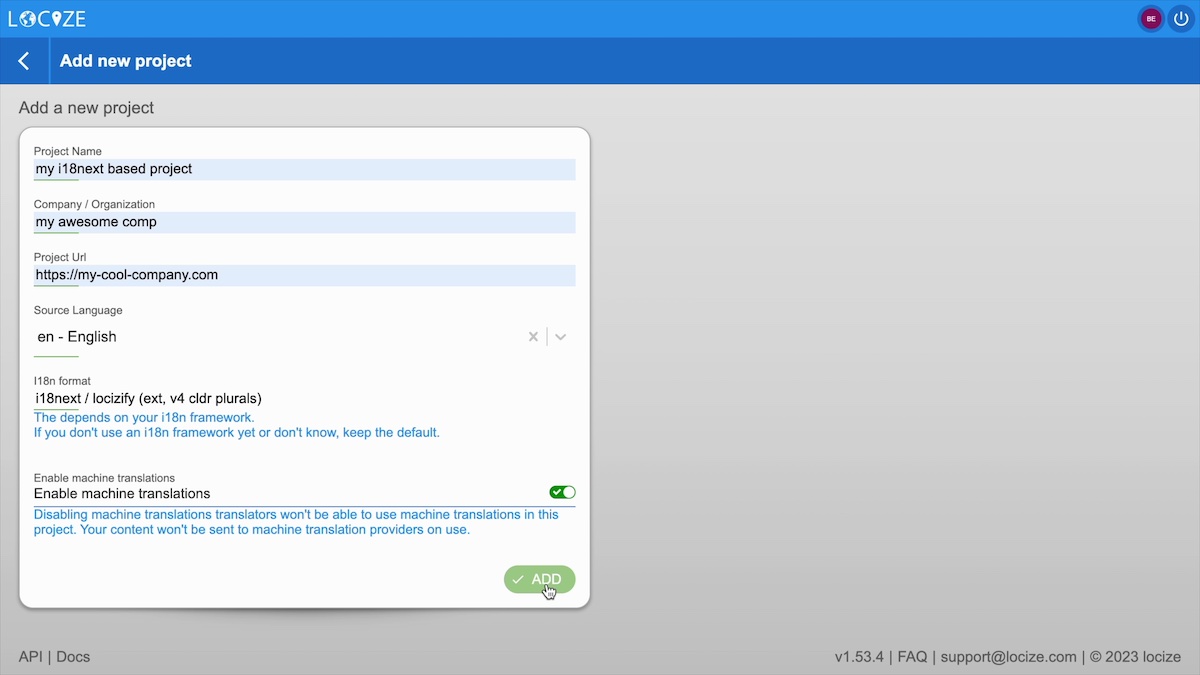
Define your source language and if needed change the i18n format.
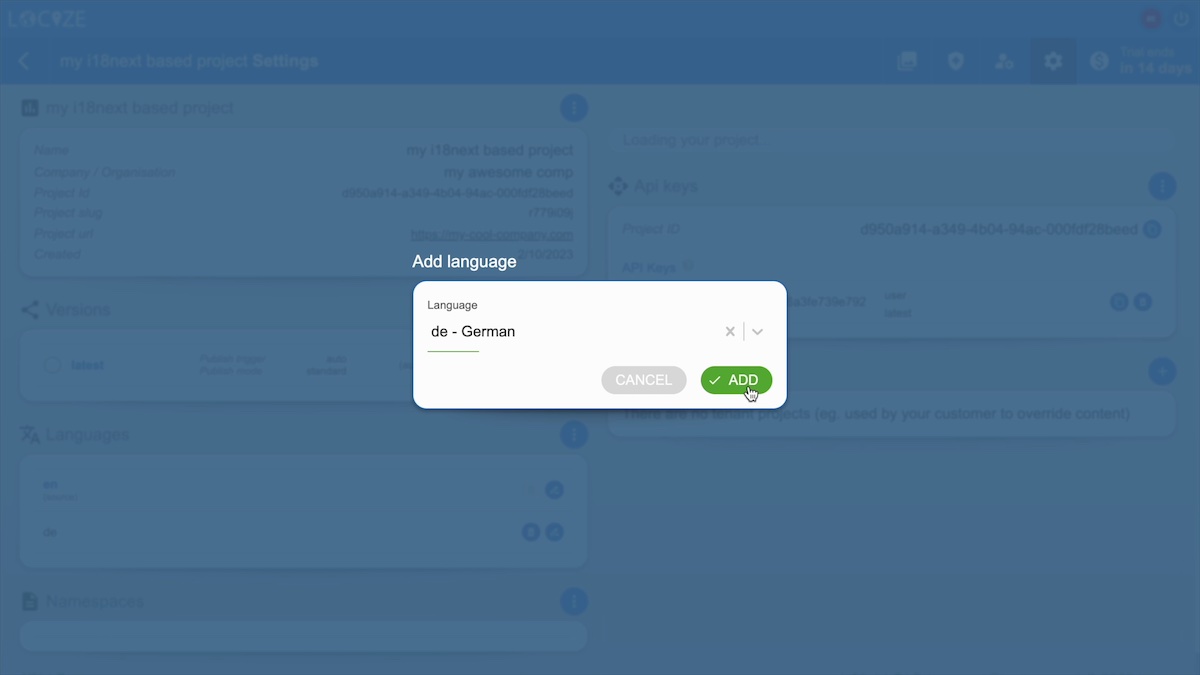
Then, add all your target languages, as described here
Step 2 - Migrate your translations
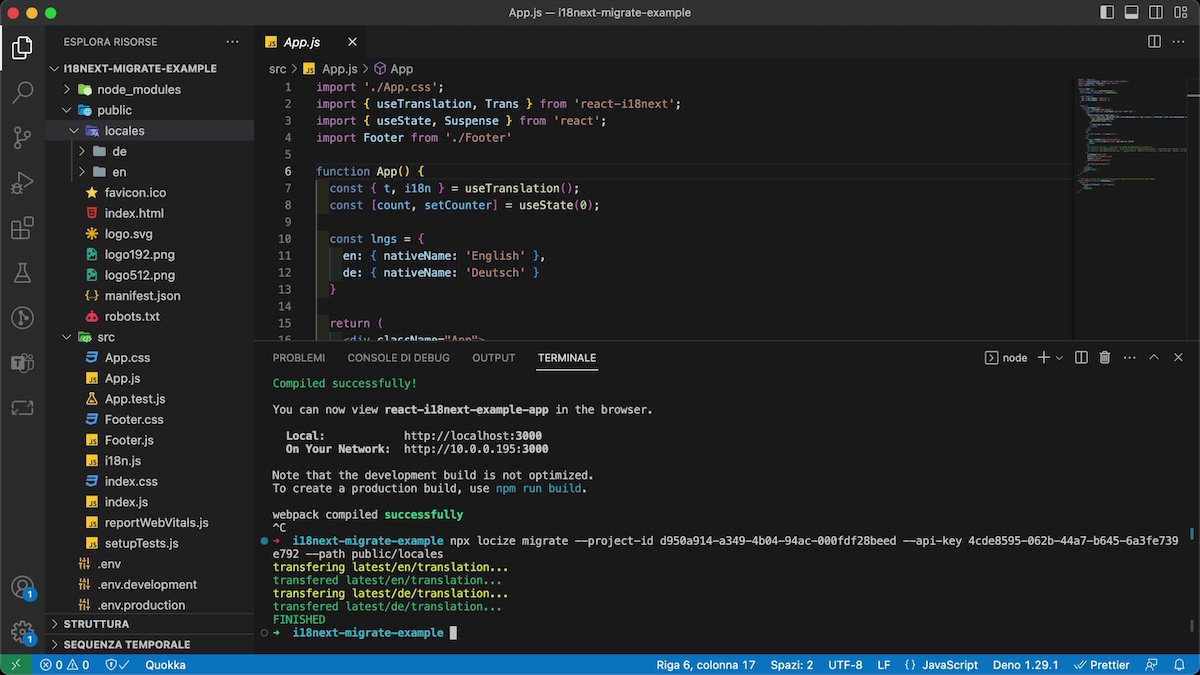
Execute the locize cli migrate command.
Copy-Paste the project-id and the api-key from your locize project settings page, and use it as arguments for your command. Also, make sure to pass the path of your current translation files.
npx locize migrate --project-id d950a914-a349-4b04-94ac-000fdf28beed --api-key 4cde8595-062b-44a7-b645-6a3fe739e792 --path public/locales
Step 3 - i18next-locize-backend
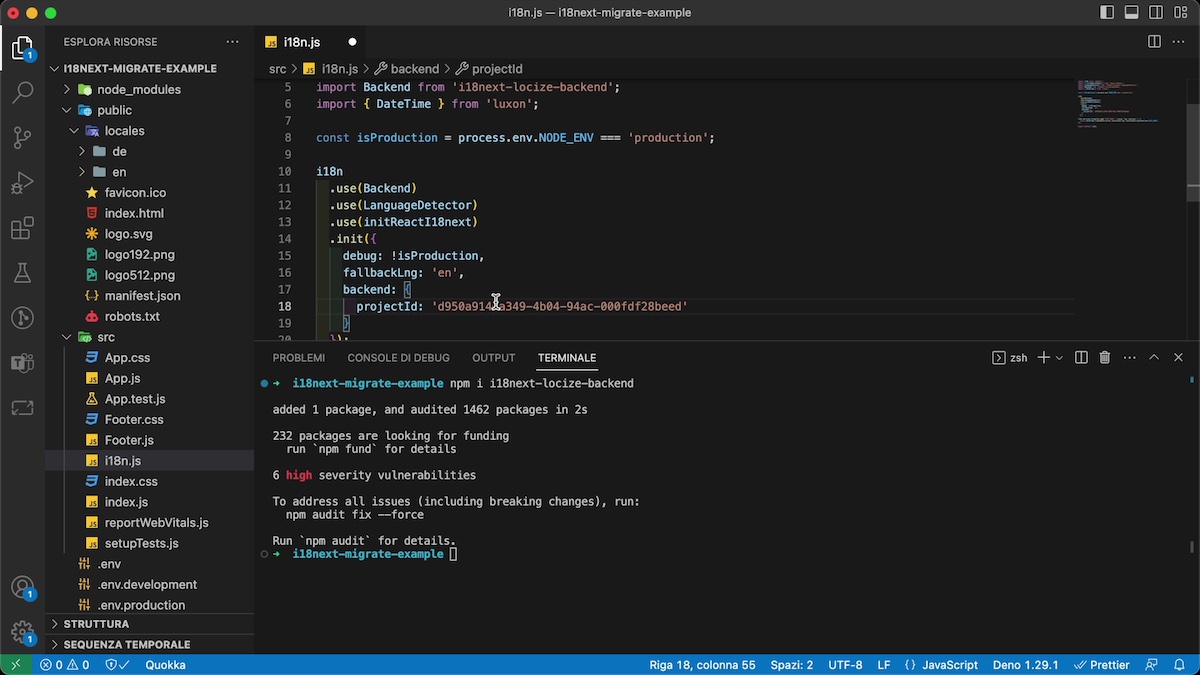
Install the i18next-locize-backend plugin and replace your current backend plugin.
Copy the project-id and pass it via i18next backend options.
Done!
Yes, the important part is already done.
Now the translations are directly coming from locize. This means you can also delete your old locales directory.
If you change a translation text in locize, you can see the updated texts in your UI.
This is already awesome, but we can do more.
Extra Step 4 - InContext editor
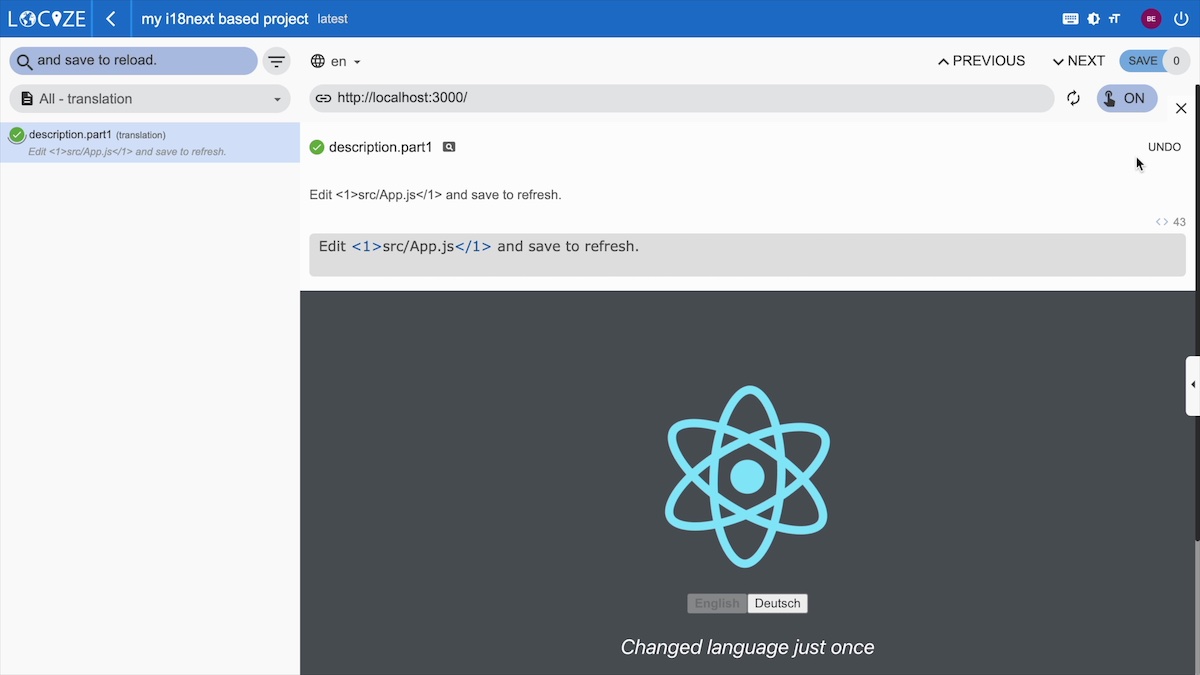
By installing the locize module and passing it to i18next, we can work directly within the InContext view of locize.
Extra Step 5 - Save missing keys
Enabling the saveMissing option of i18next and passing the api-key via backend options, will automatically add newly defined keys to locize.
Additionally, if you enable the automatic machine/docs/automatic-translation translation option in locize, the passed default value of your new keys is automatically translated into your target languages.

That's just a first sneak peek on how you can power up i18next.
locize offers a lot more.
Try it for free and send us your feedback.

