Optimize Next.js translations (next-i18next guide)
Writing Next.js code blurs the lines between client side and server side.
The code is written once and depending on your needs it is then executed as SSG (static-site generation), SSR (server-side rendering) or CSR (client-side rendering), etc.
So also the internationalization, right?
How to optimize Next.js apps to best work with translations on server side and on client side with next-i18next?
If you're using Next.js 13 with app directory, have a look at this blog post.
Let's take the example of next-i18next. While next-i18next uses i18next and react-i18next under the hood, users of next-i18next simply need to include their translation content as JSON files and don't have to worry about much else.
By default, there is one next-i18next configuration that loads the translations from the local directory structure and renders the pages on server side.
This is ok, it works and is optimized for SEO etc. but there is more we could do.
What if we could power up the seo optimized website with always up-to-date translations without the need to redeploy your app?
We will discuss 2 different setups: One with an active backend and another one completely statically generated.
The basic target is always the same: We want everything to be SEO optimized in all languages and serve always the newest translations to our users.
Example with a backend server

Having a backend server does not mean you are forced to run your own server. It can also be a PaaS or serverless solution, like Vercel or Netlify, etc.
Ok, let's start with the default:
You followed the normal next-i18next setup guide and now your translations are organized more or less as such:
.
└── public
    └── locales
        ├── en
        |   └── common.json
        └── de
            └── common.json
Now let's connect to an awesome translation management system and manage your translations outside of your code.
Let's synchronize the translation files with Locize. This can be done on-demand or on the CI-Server or before deploying the app.
What to do to reach this step:
- in Locize: signup at https://locize.app/register and login
- in Locize: create a new project
- in Locize: add all your additional languages (this can also be done via API)
- install the locize-cli (
npm i locize-cli)
Use the locize-cli
Use the locize sync command to synchronize your local repository (public/locales) with what is published on Locize.
Alternatively, you can also use the locize download command to always download the published Locize translations to your local repository (public/locales) before bundling your app.
But you were talking about having always up-to-date translations without the need to redeploy your app?
Yes, let's adapt for that:
We will use the i18next-locize-backend plugin, but only on client side.
Together with some other i18next dependencies:
npm install i18next-locize-backend i18next-chained-backend i18next-localstorage-backend
And we adapt the next-i18next.config.js file:
// next-i18next.config.js
const LocizeBackend = require('i18next-locize-backend/cjs')
const ChainedBackend = require('i18next-chained-backend').default
const LocalStorageBackend = require('i18next-localstorage-backend').default

const isBrowser = typeof window !== 'undefined'

module.exports = {
  // debug: true,
  i18n: {
    defaultLocale: 'en',
    locales: ['en', 'de', 'it'],
  },
  backend: {
    backendOptions: [
      {
        expirationTime: 60 * 60 * 1000 // 1 hour
      },
      {
        projectId: 'd3b405cf-2532-46ae-adb8-99e88d876733',
        version: 'latest'
      }
    ],
    backends: isBrowser ? [LocalStorageBackend, LocizeBackend] : [],
  },
  serializeConfig: false,
  use: isBrowser ? [ChainedBackend] : []
}
Removing the serverSideTranslation to getStaticProps or getServerSideProps (depending on your case) in the page-level components would work, but would not correctly render the server side html. But the client side would be fine.
//
// Without the getStaticProps or getServerSideProps function,
// the translsations are loaded via configured i18next backend.
// Also make sure you set the partialBundledLanguages option to true, like here: https://github.com/i18next/i18next-http-backend/blob/master/example/next/next-i18next.config.js#L14
//
// export const getStaticProps = async ({ locale }) => {
//   return {
//     props: await serverSideTranslations(locale, ['common', 'footer'])
//   }
// }
This can be optimized by keeping the getServerSideProps or getStaticProps function and making use of the reloadResources functionality of i18next.
const HomePage = () => {

  const { t, i18n } = useTranslation(['common', 'footer'], { bindI18n: 'languageChanged loaded' })
  // bindI18n: loaded is needed because of the reloadResources call
  // if all pages use the reloadResources mechanism, the bindI18n option can also be defined in next-i18next.config.js
  useEffect(() => {
    i18n.reloadResources(i18n.resolvedLanguage, ['common', 'footer'])
  }, [])

  return (
    <>
      <main>
        <Header heading={t('h1')} title={t('title')} />
        <Link href='/'>
          <button
            type='button'
          >
            {t('back-to-home')}
          </button>
        </Link>
      </main>
      <Footer />
    </>
  )
}

export const getStaticProps = async ({ locale }) => ({
  props: {
    ...await serverSideTranslations(locale, ['common', 'footer']),
  },
})

export default HomePage
This way the ready check is also not necessary, because the translations served directly by the server are used. And as soon the translations are reloaded, new translations are shown.
That's it! Let's check the result:
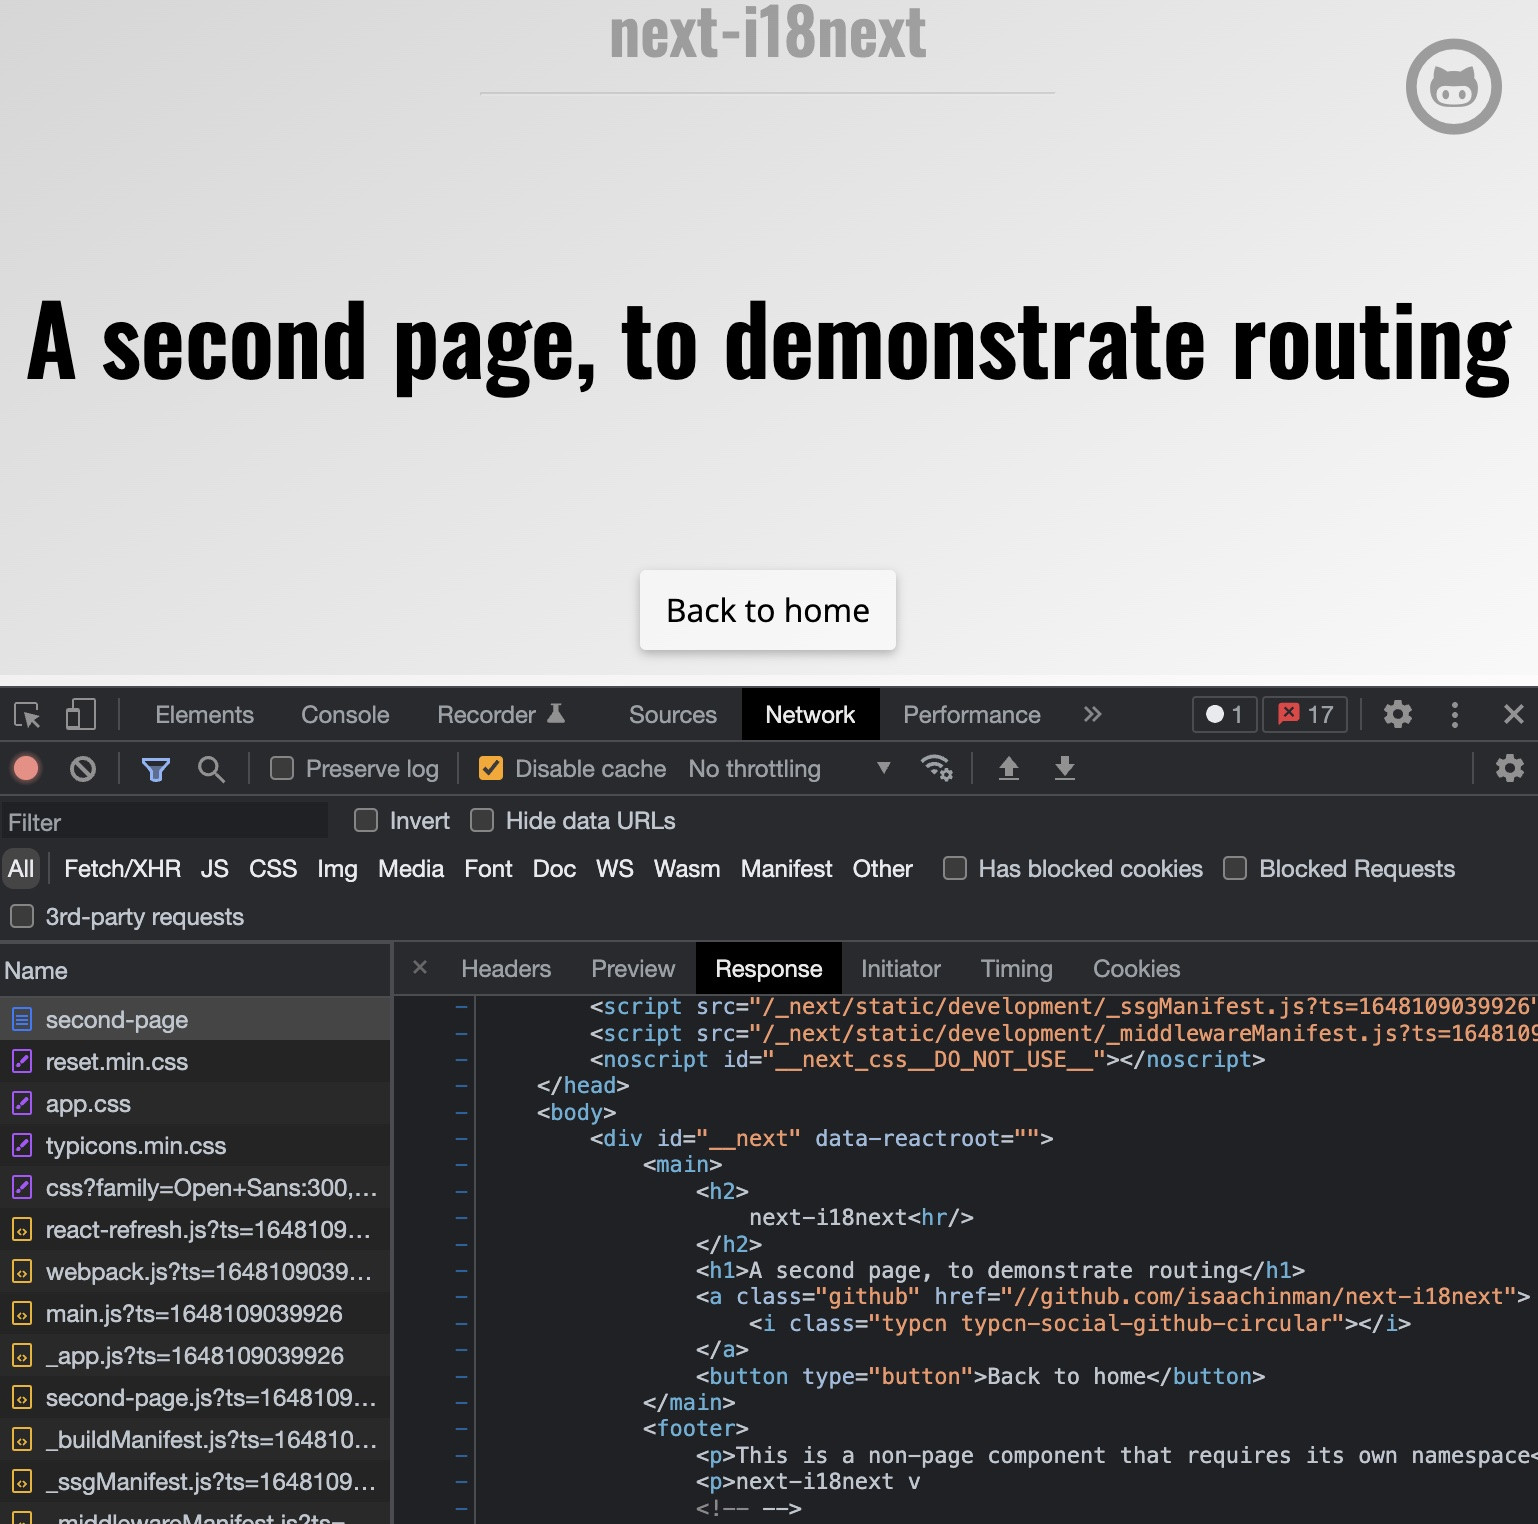
The HTML returned from the server looks correctly translated. So this is well optimized for search engines.

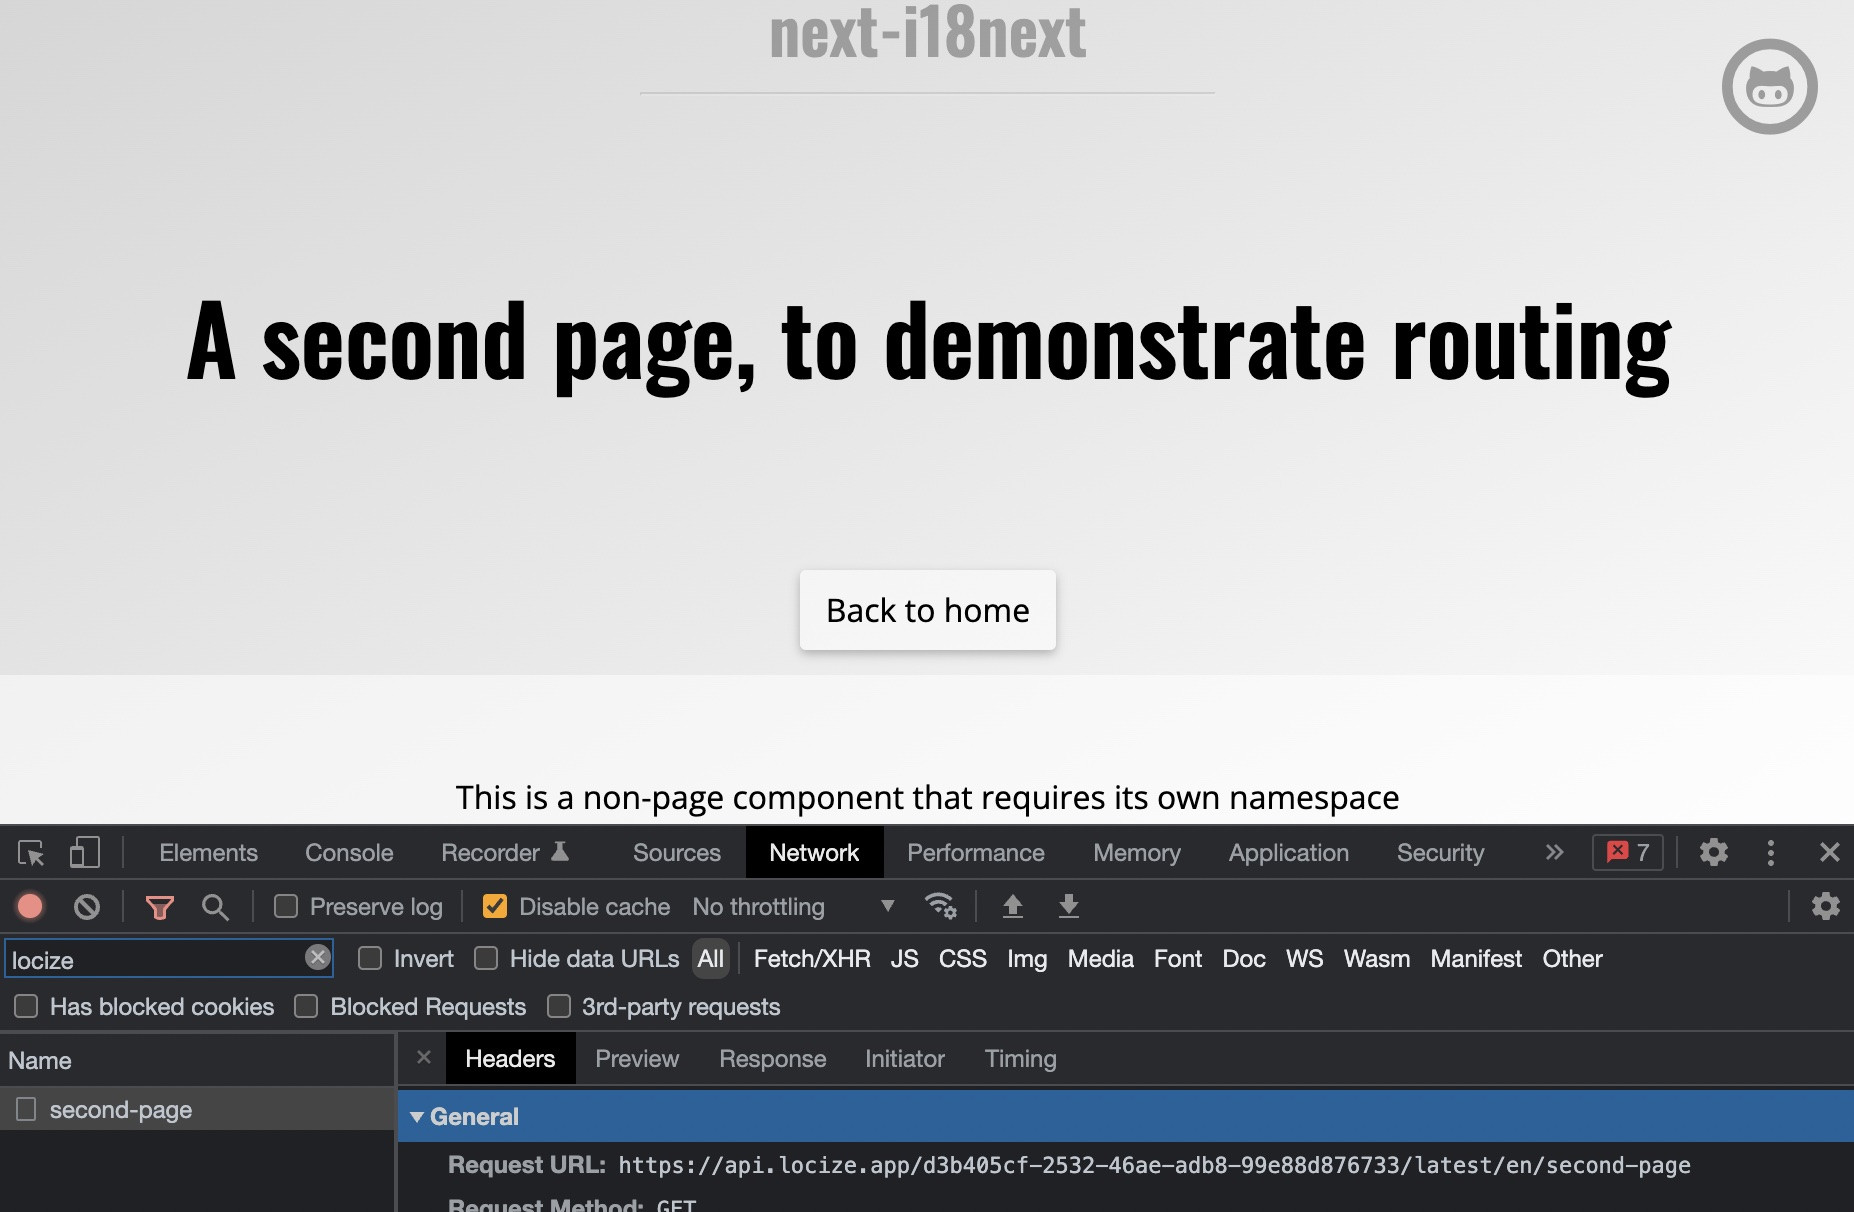
And on client side, the up-to-date translations are directly fetched from the Locize CDN.

🙀 This means you can fix translations without having to change your code or redeploy your app. 🤩
🧑💻 The code can be found here.
Additional hint:
If you've configured caching for your Locize version, you may not need the i18next-localstorage-backend and i18next-chained-backend plugin.
// next-i18next.config.js
const LocizeBackend = require('i18next-locize-backend/cjs')

const isBrowser = typeof window !== 'undefined'

module.exports = {
  // debug: true,
  i18n: {
    defaultLocale: 'en',
    locales: ['en', 'de', 'it'],
  },
  backend: isBrowser
    ? {
        projectId: 'd3b405cf-2532-46ae-adb8-99e88d876733',
        version: 'production'
      }
    : undefined,
  serializeConfig: false,
  use: isBrowser ? [LocizeBackend] : []
}
Static Website example

With this example, we just need a static webserver, like GitHub Pages or similar.
It's pretty much the same as with above example, but there are some little things we need to additionally consider.
To work with static-site generation (SSG) we need to use the next export command, but...
Error: i18n support is not compatible with next export. See here for more info on deploying: https://nextjs.org/docs/deployment
This happens if you're using the internationalized routing feature and are trying to generate a static HTML export by executing next export.
Well, this features requires a Node.js server, or dynamic logic that cannot be computed during the build process, that's why it is unsupported.
There is a dedicated article with a solution to that Next.js problem. Follow that guide first!

Done so? Then let's continue here:
It's the same next-i18next.config.js config like in the previous example:
// next-i18next.config.js
const LocizeBackend = require('i18next-locize-backend/cjs')
const ChainedBackend = require('i18next-chained-backend').default
const LocalStorageBackend = require('i18next-localstorage-backend').default

// If you've configured caching for your locize version, you may not need the i18next-localstorage-backend and i18next-chained-backend plugin.
// /docs/more/caching

const isBrowser = typeof window !== 'undefined'

module.exports = {
  // debug: true,
  i18n: {
    defaultLocale: 'en',
    locales: ['en', 'de', 'it'],
  },
  backend: {
    backendOptions: [
      {
        expirationTime: 60 * 60 * 1000 // 1 hour
      },
      {
        projectId: 'd3b405cf-2532-46ae-adb8-99e88d876733',
        version: 'latest'
      }
    ],
    backends: isBrowser ? [LocalStorageBackend, LocizeBackend] : [],
  },
  serializeConfig: false,
  use: isBrowser ? [ChainedBackend] : []
}
Extend the makeStaticProps function with options (emptyI18nStoreStore):
export function makeStaticProps(ns = [], opt = {}) {
  return async function getStaticProps(ctx) {
    const props = await getI18nProps(ctx, ns)
    if (opt.emptyI18nStoreStore) {
      // let the client fetch the translations
      props._nextI18Next.initialI18nStore = null
    }
    return {
      props
    }
  }
}
...and use it accordingly:
const getStaticProps = makeStaticProps(['common', 'footer'], { emptyI18nStoreStore: true })
export { getStaticPaths, getStaticProps }
That's it! Let's check the result:
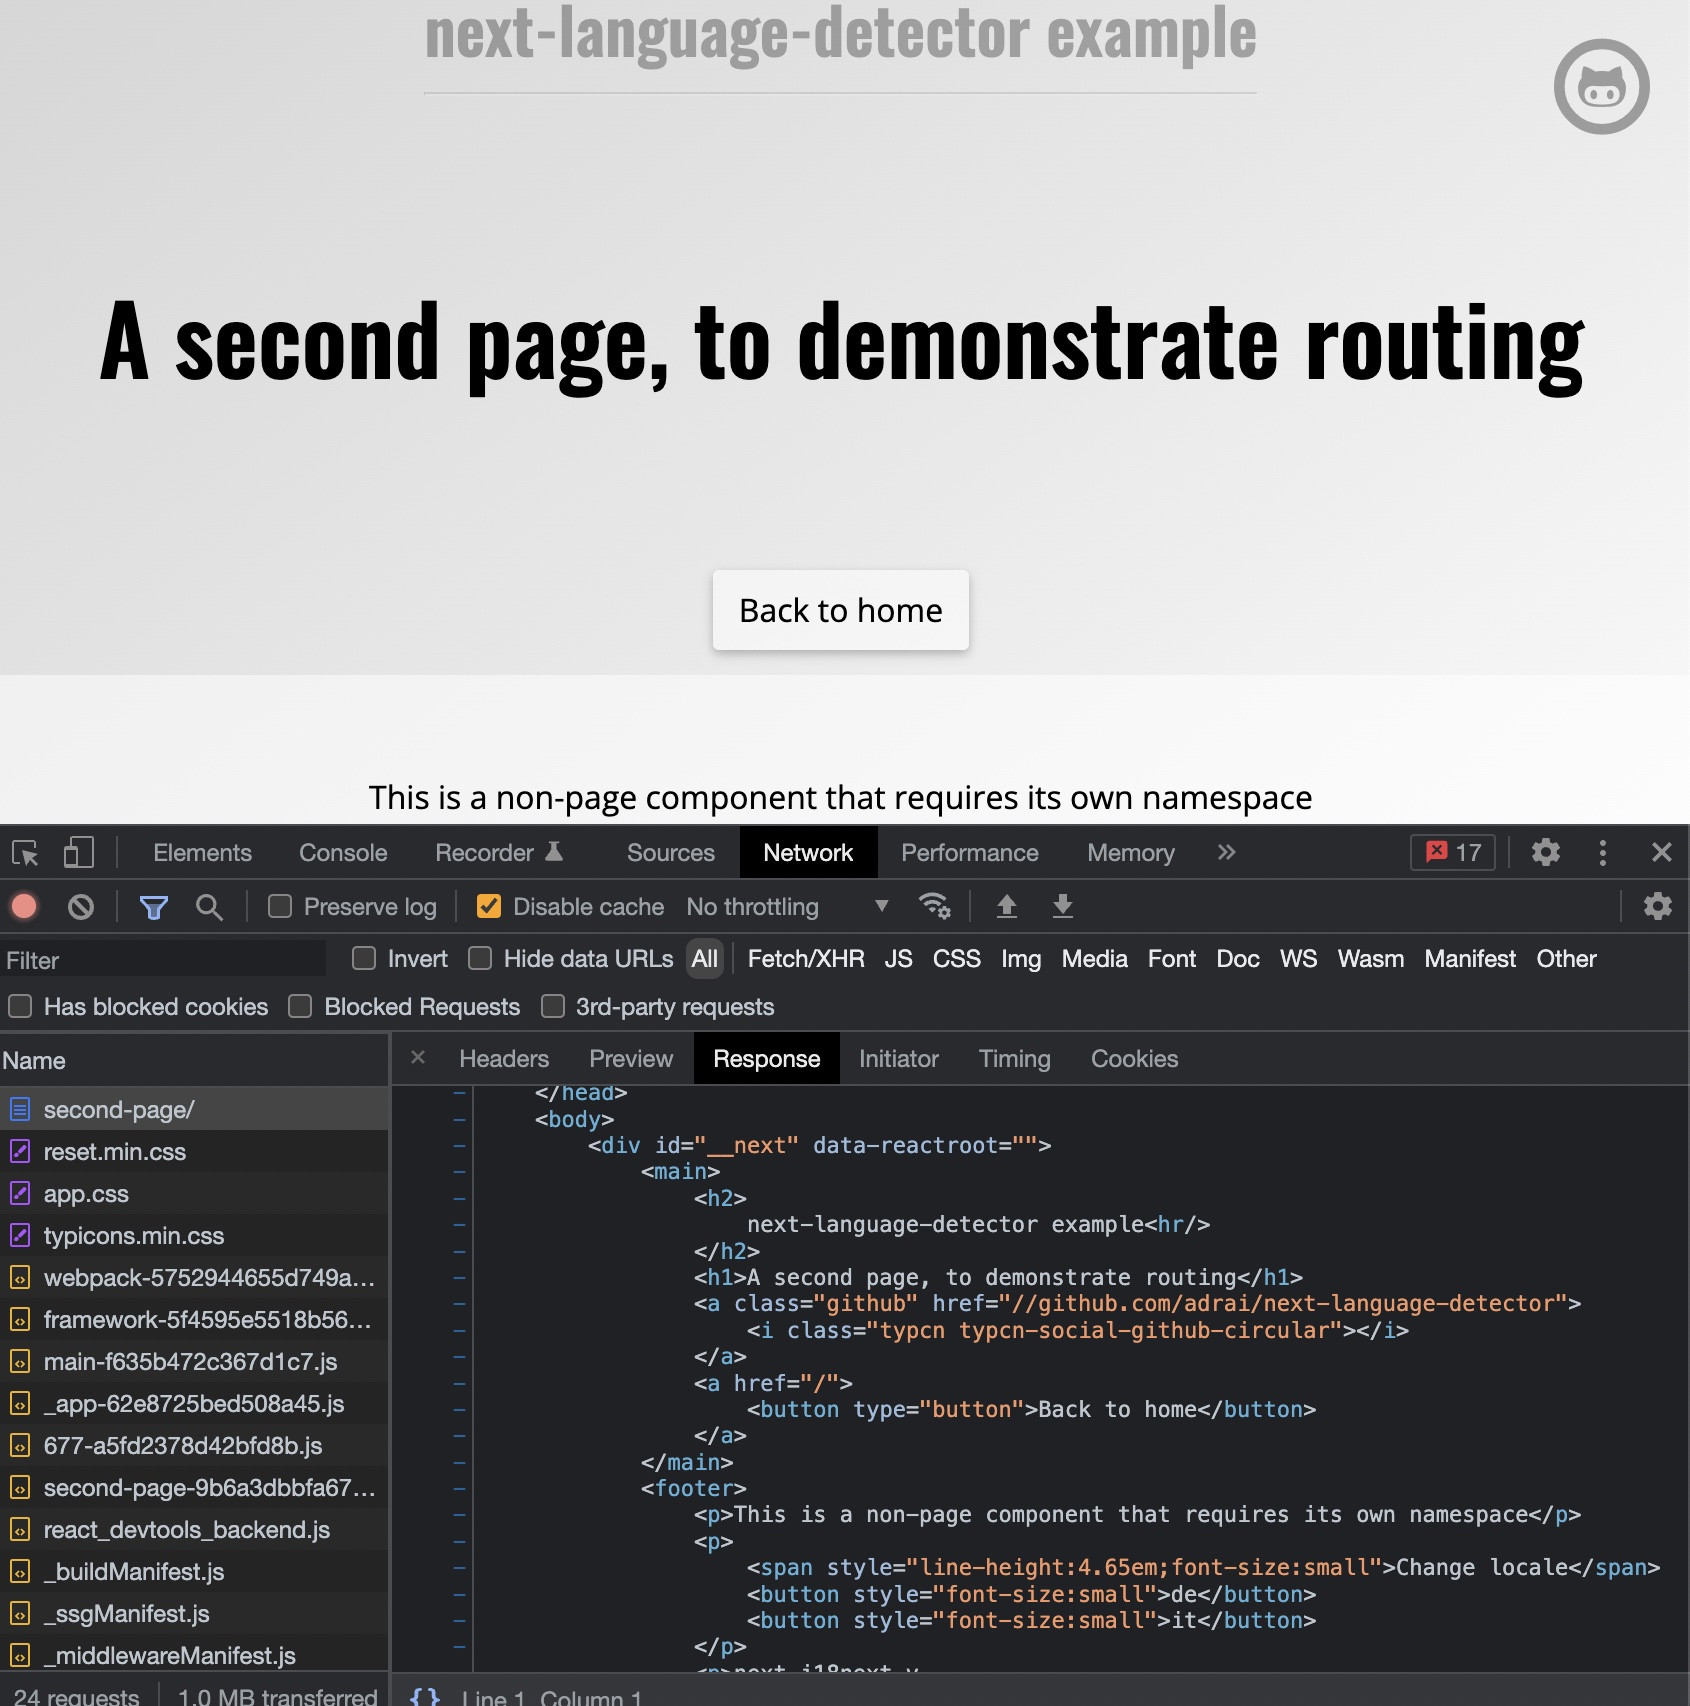
The generated static HTML looks correctly translated. So this is well optimized for search engines.

And on client side, the up-to-date translations are directly fetched from the Locize CDN.

🙀 This means you can fix translations without having to change your code or redeploy your app. And without owning an active server. 🤩
🧑💻 The code can be found here.
Continuous Localization
Since we're now "connected" to a smart translation management system, we can try to make use of its full potential.
save missing translations
I wish newly added keys in the code, would automatically be saved to Locize.
Your wish is my command!
Extend the next-i18next config with the Locize api-key and set saveMissing: true:
// next-i18next.config.js
const LocizeBackend = require('i18next-locize-backend/cjs')

const isBrowser = typeof window !== 'undefined'

module.exports = {
  // debug: true,
  i18n: {
    defaultLocale: 'en',
    locales: ['en', 'de'],
  },
  backend: {
    projectId: 'd3b405cf-2532-46ae-adb8-99e88d876733',
    apiKey: '14bbe1fa-6ffc-40f5-9226-7462aa4a042f',
    version: 'latest'
  },
  serializeConfig: false,
  use: isBrowser ? [LocizeBackend] : [],
  saveMissing: true // do not set saveMissing to true for production and also not when using the chained backend
}
Each time you'll use a new key, it will be sent to Locize, i.e.:
<div>{t('new.key', 'this will be added automatically')}</div>will result in Locize like this:

👀 but there's more...
Thanks to the locize-lastused plugin, you'll be able to find and filter in Locize which keys are used or not used anymore.
With the help of the Locize plugin, you'll be able to use your app within the Locize InContext Editor.
Lastly, with the help of the auto-machinetranslation workflow and the use of the saveMissing functionality, new keys not only gets added to Locize automatically, while developing the app, but are also automatically translated into the target languages using machine translation.
Check out this video to see how the automatic machine translation workflow looks like!
npm install locize-lastused locize
use them like this:
// next-i18next.config.js
const LocizeBackend = require('i18next-locize-backend/cjs')

const isBrowser = typeof window !== 'undefined'

const locizeOptions = {
  projectId: 'd3b405cf-2532-46ae-adb8-99e88d876733',
  apiKey: '14bbe1fa-6ffc-40f5-9226-7462aa4a042f',
  version: 'latest'
}

module.exports = {
  // debug: true,
  i18n: {
    defaultLocale: 'en',
    locales: ['en', 'de'],
  },
  backend: locizeOptions,
  locizeLastUsed: locizeOptions,
  serializeConfig: false,
  use: isBrowser
    ? [LocizeBackend, require('locize').locizePlugin, require('locize-lastused/cjs')]
    : [], // do not use locize-lastused on production
  saveMissing: true // do not set saveMissing to true for production and also not when using the chained backend
}
Automatic machine translation:

Last used translations filter:


📦 Let's prepare for production 🚀
Now, we prepare the app for going to production.
First in Locize, create a dedicated version for production. Do not enable auto publish for that version but publish manually or via API or via CLI. Lastly, enable Cache-Control max-age for that production version.
Let's adapt the next-i18next.config.js file once again:
// next-i18next.config.js
const LocizeBackend = require('i18next-locize-backend/cjs')

const isBrowser = typeof window !== 'undefined'

const locizeOptions = {
  projectId: 'd3b405cf-2532-46ae-adb8-99e88d876733',
  apiKey: '14bbe1fa-6ffc-40f5-9226-7462aa4a042f',
  version: 'latest'
}

module.exports = {
  // debug: true,
  i18n: {
    defaultLocale: 'en',
    locales: ['en', 'de'],
  },
  backend: locizeOptions,
  locizeLastUsed: locizeOptions,
  serializeConfig: false,
  use: isBrowser
    ? [LocizeBackend, require('locize').locizePlugin, require('locize-lastused/cjs')]
    : [], // do not use locize-lastused on production
  saveMissing: true // do not set saveMissing to true for production and also not when using the chained backend
}
Now, during development, you'll continue to save missing keys and to make use of lastused feature. => npm run dev
And in production environment, saveMissing and lastused are disabled. => npm run build && npm start


🧑💻 The complete code can be found here.
Check also the code integration part in this YouTube video.
There's also an i18next crash course video.
🎉🥳 Congratulations 🎊🎁
Awesome! Thanks to next-i18next, i18next, react-i18next and Locize your continuous localization workflow is ready to go.
So if you want to take your i18n topic to the next level, it's worth trying the localization management platform - Locize.
The founders of Locize are also the creators of i18next. So by using Locize you directly support the future of i18next.
